Object Storage ClickPipes provide a simple and resilient way to ingest data from Amazon S3, Google Cloud Storage, Azure Blob Storage, and DigitalOcean Spaces into ClickHouse Cloud. Both one-time and continuous ingestion are supported with exactly-once semantics.
Creating your first object storage ClickPipe
Prerequisite
- You have familiarized yourself with the ClickPipes intro.
Navigate to data sources
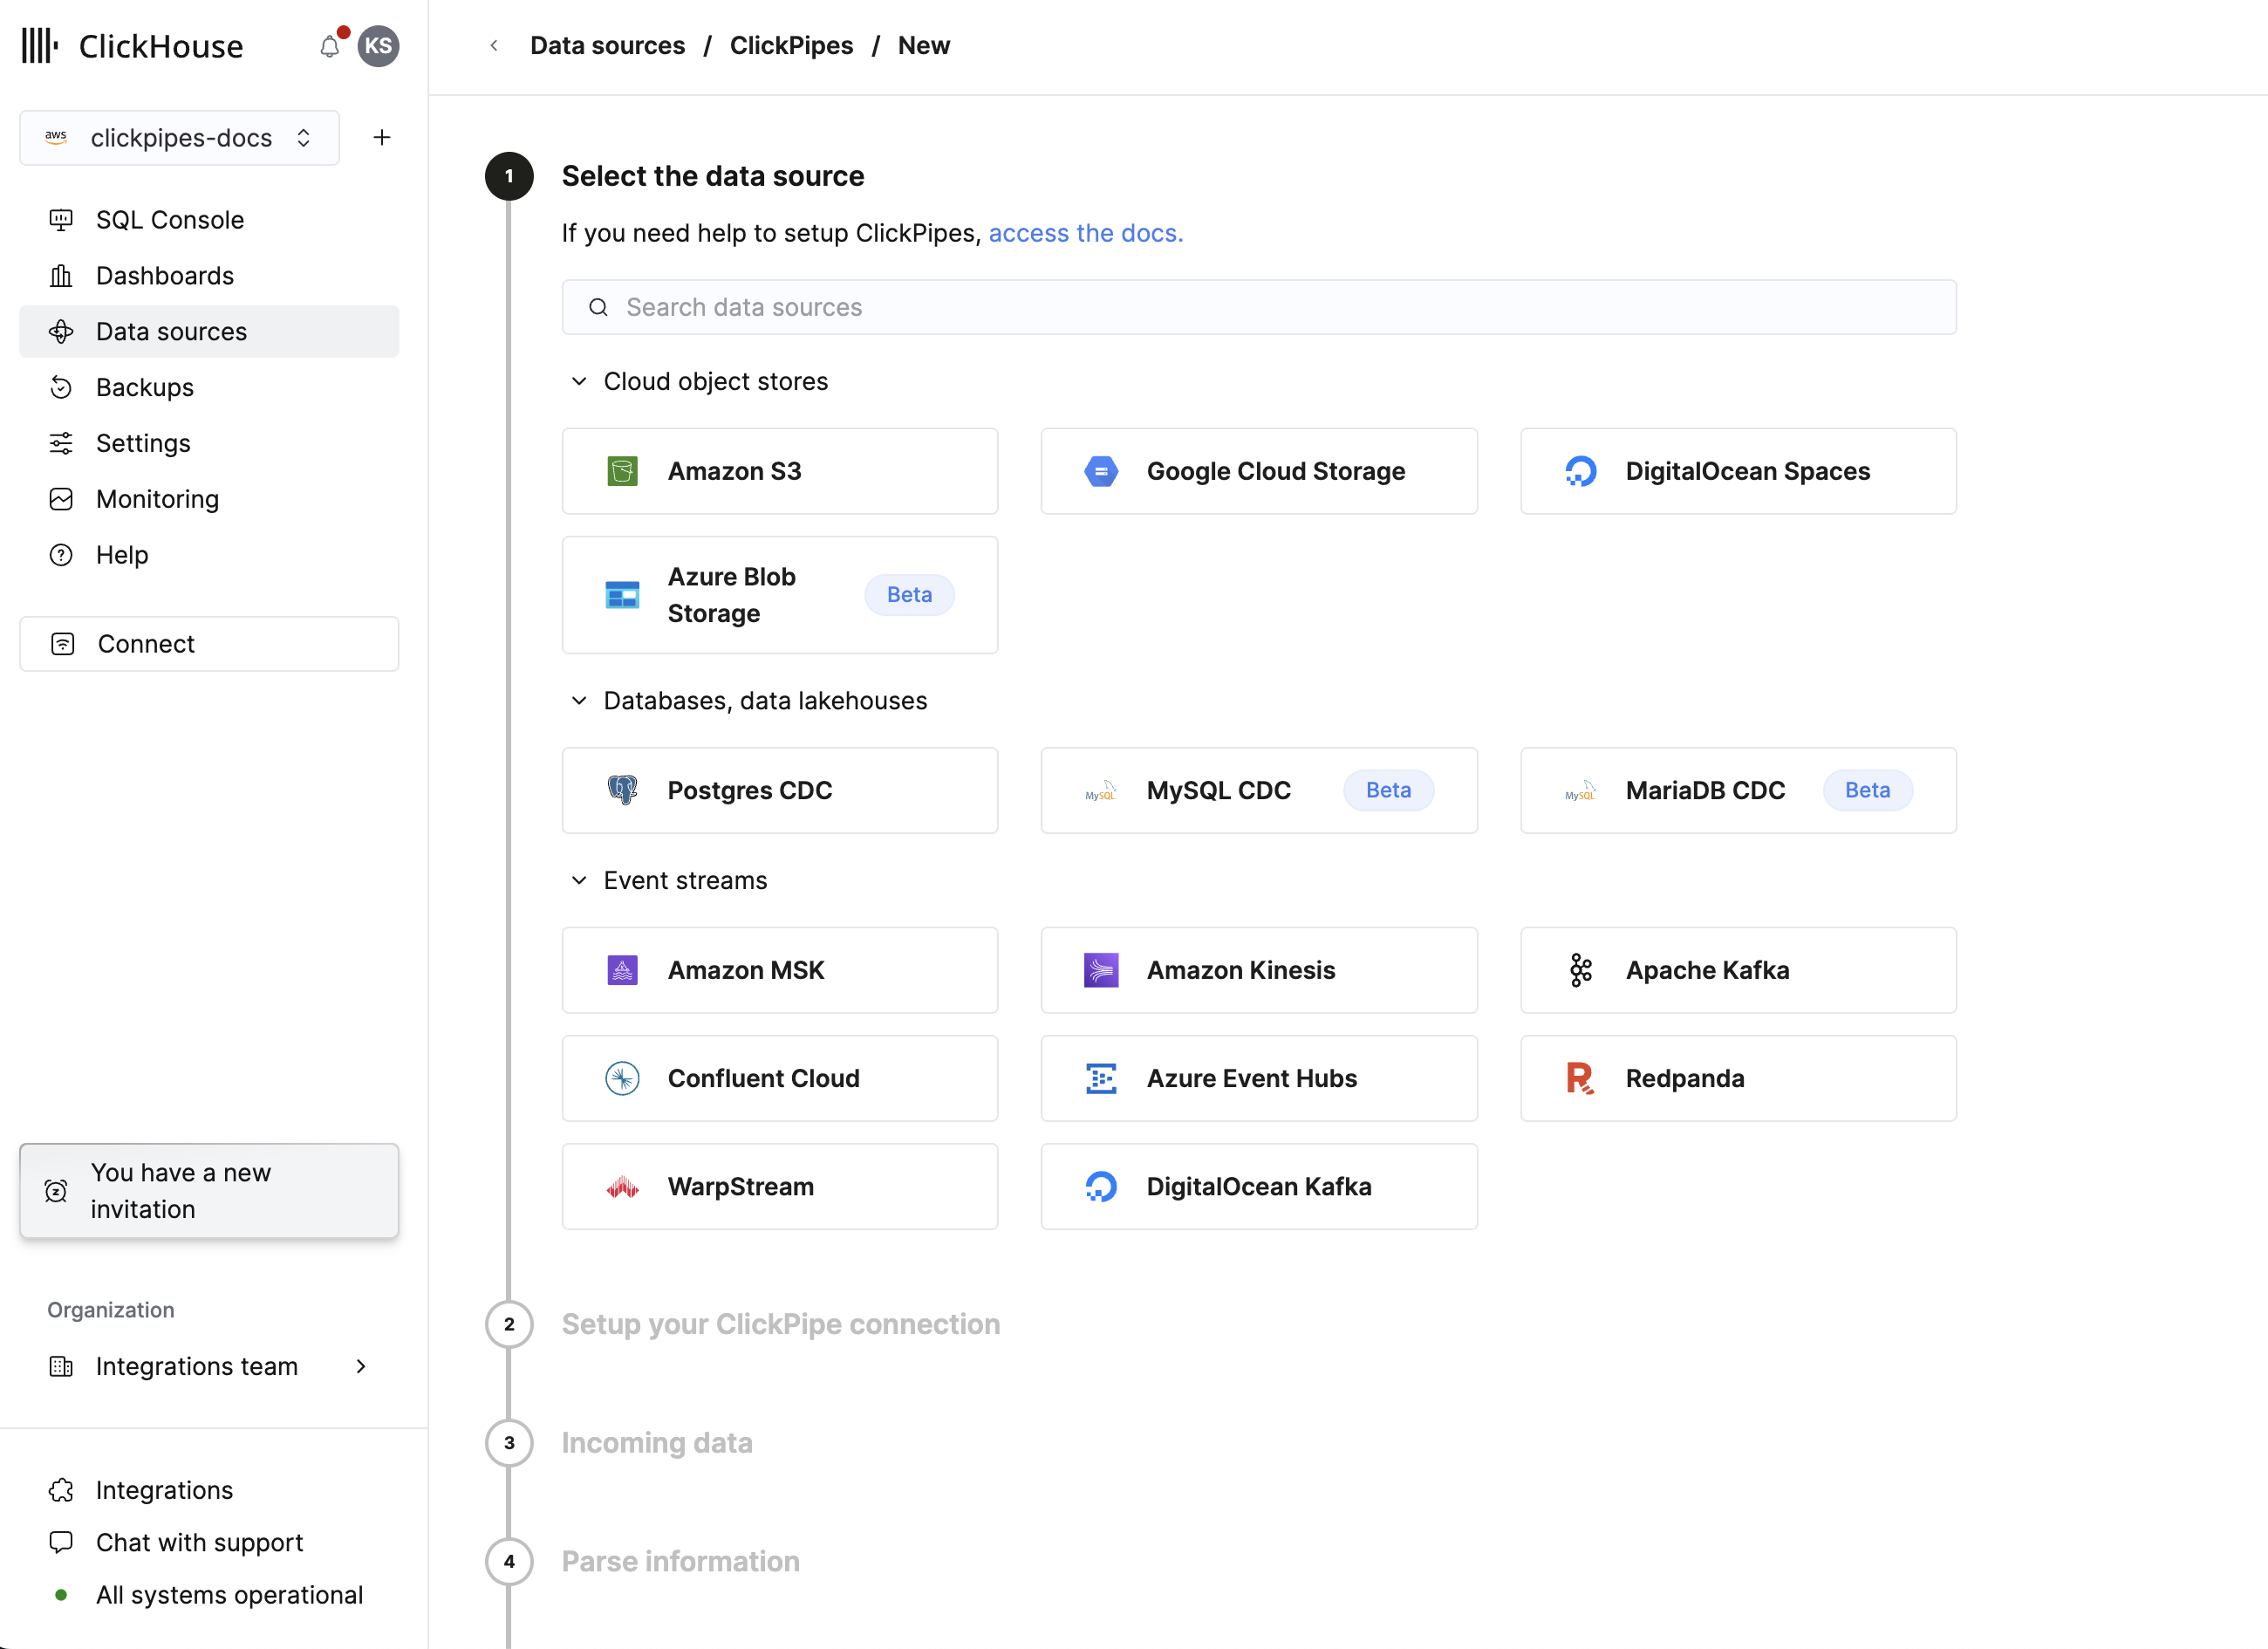
In the cloud console, select the Data Sources button on the left-side menu and click on "Set up a ClickPipe"

Select a data source
Select your data source.
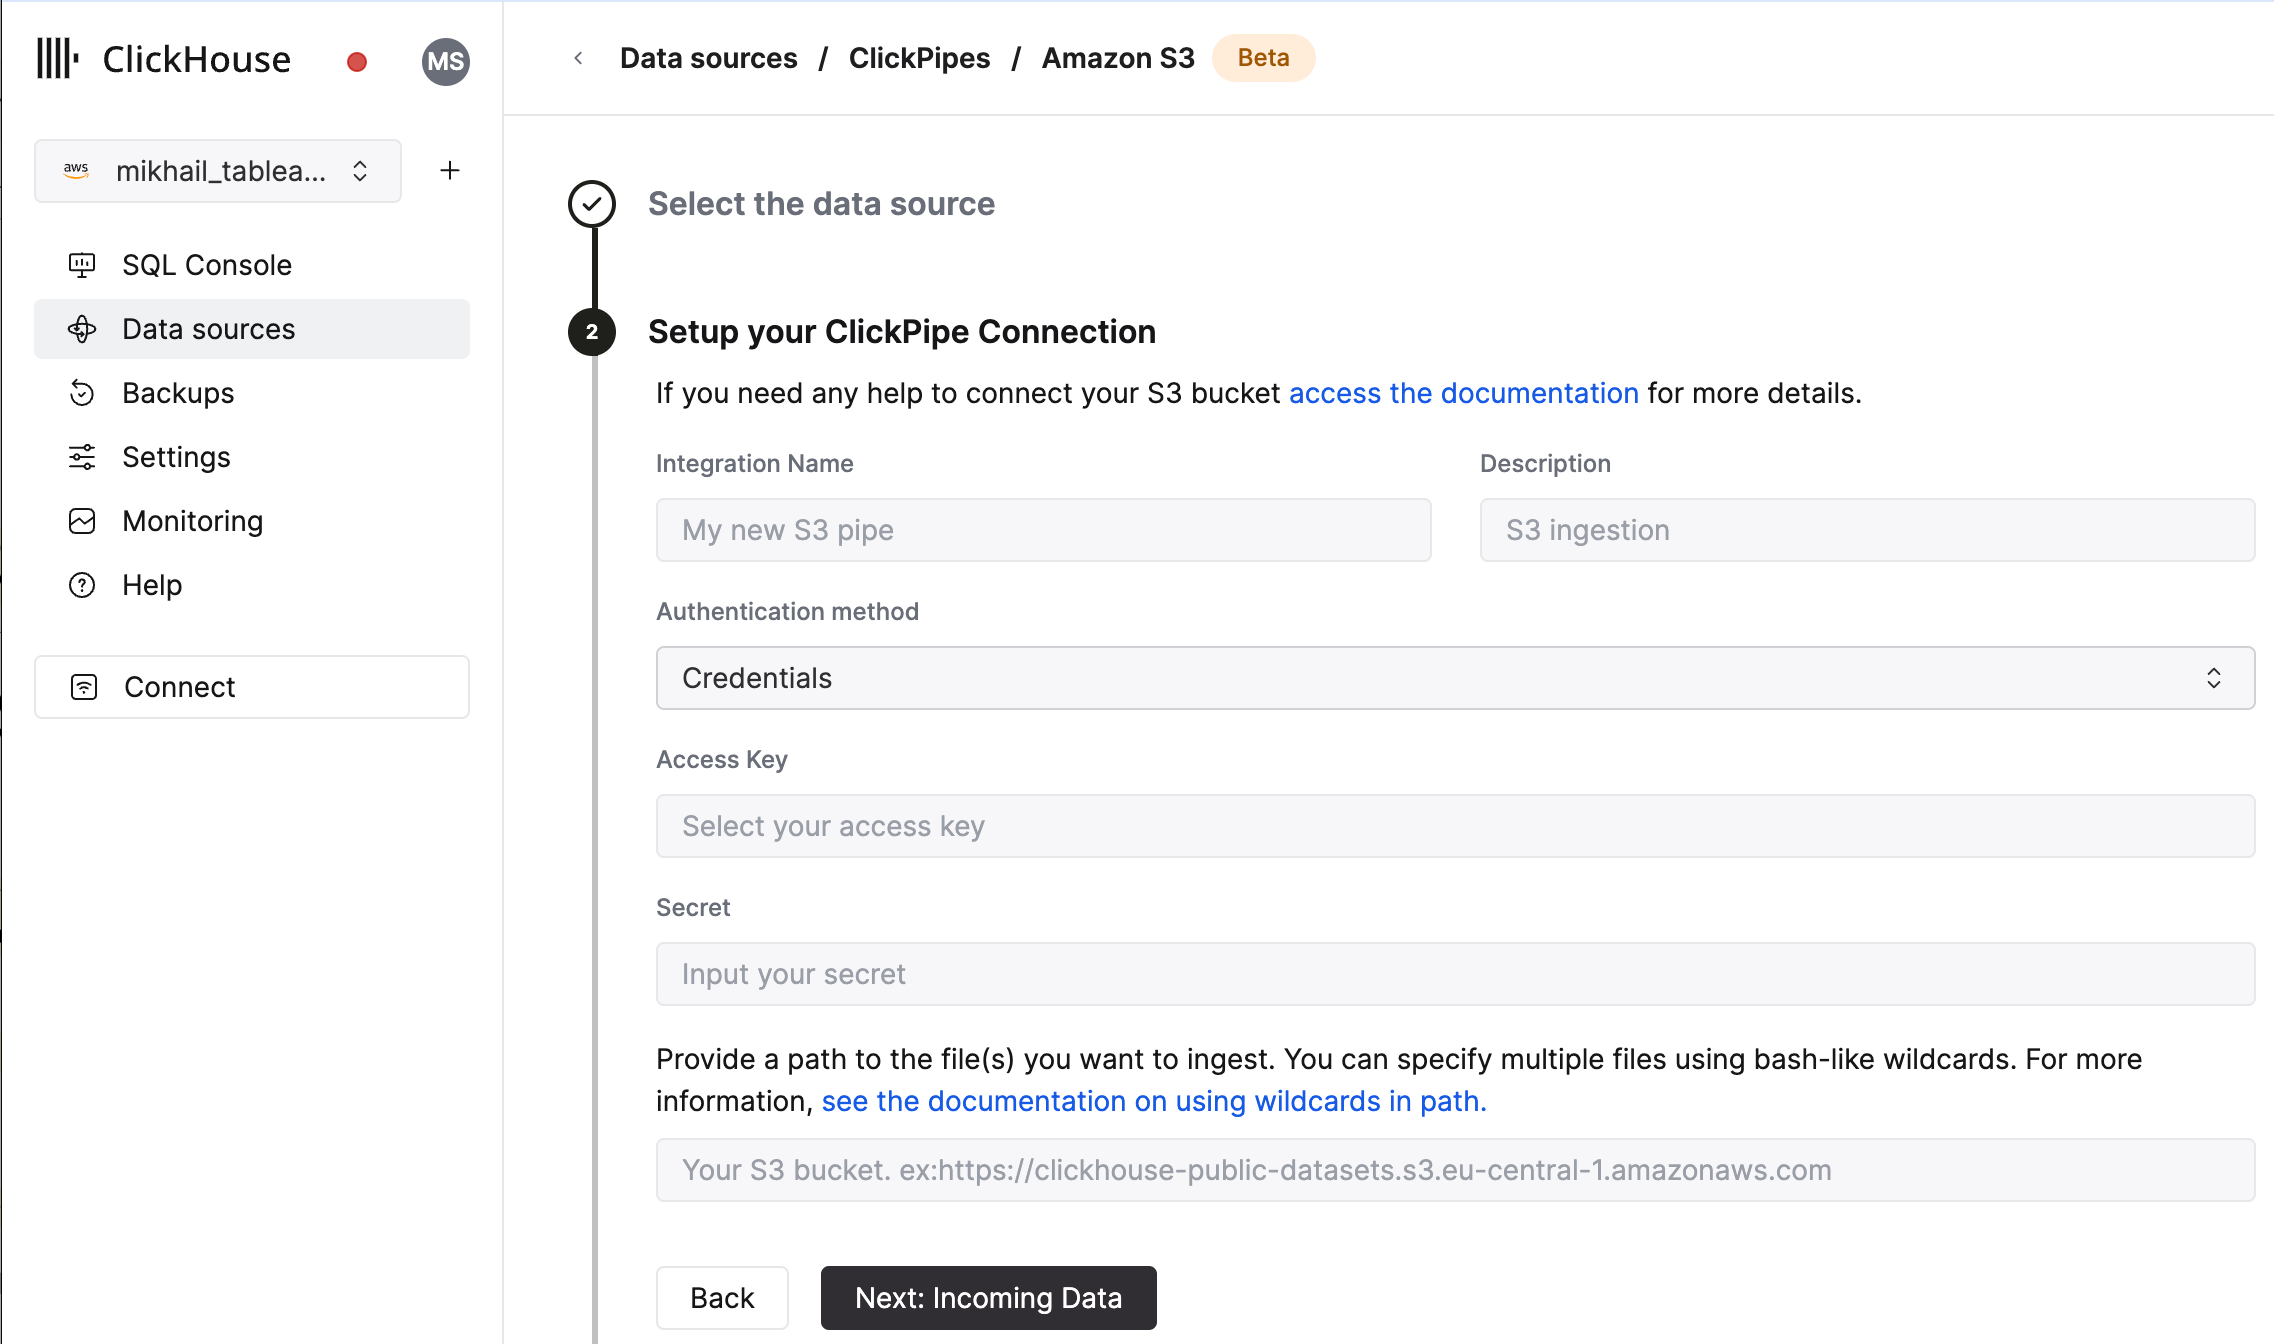
Configure the ClickPipe
Fill out the form by providing your ClickPipe with a name, a description (optional), your IAM role or credentials, and bucket URL. You can specify multiple files using bash-like wildcards. For more information, see the documentation on using wildcards in path.
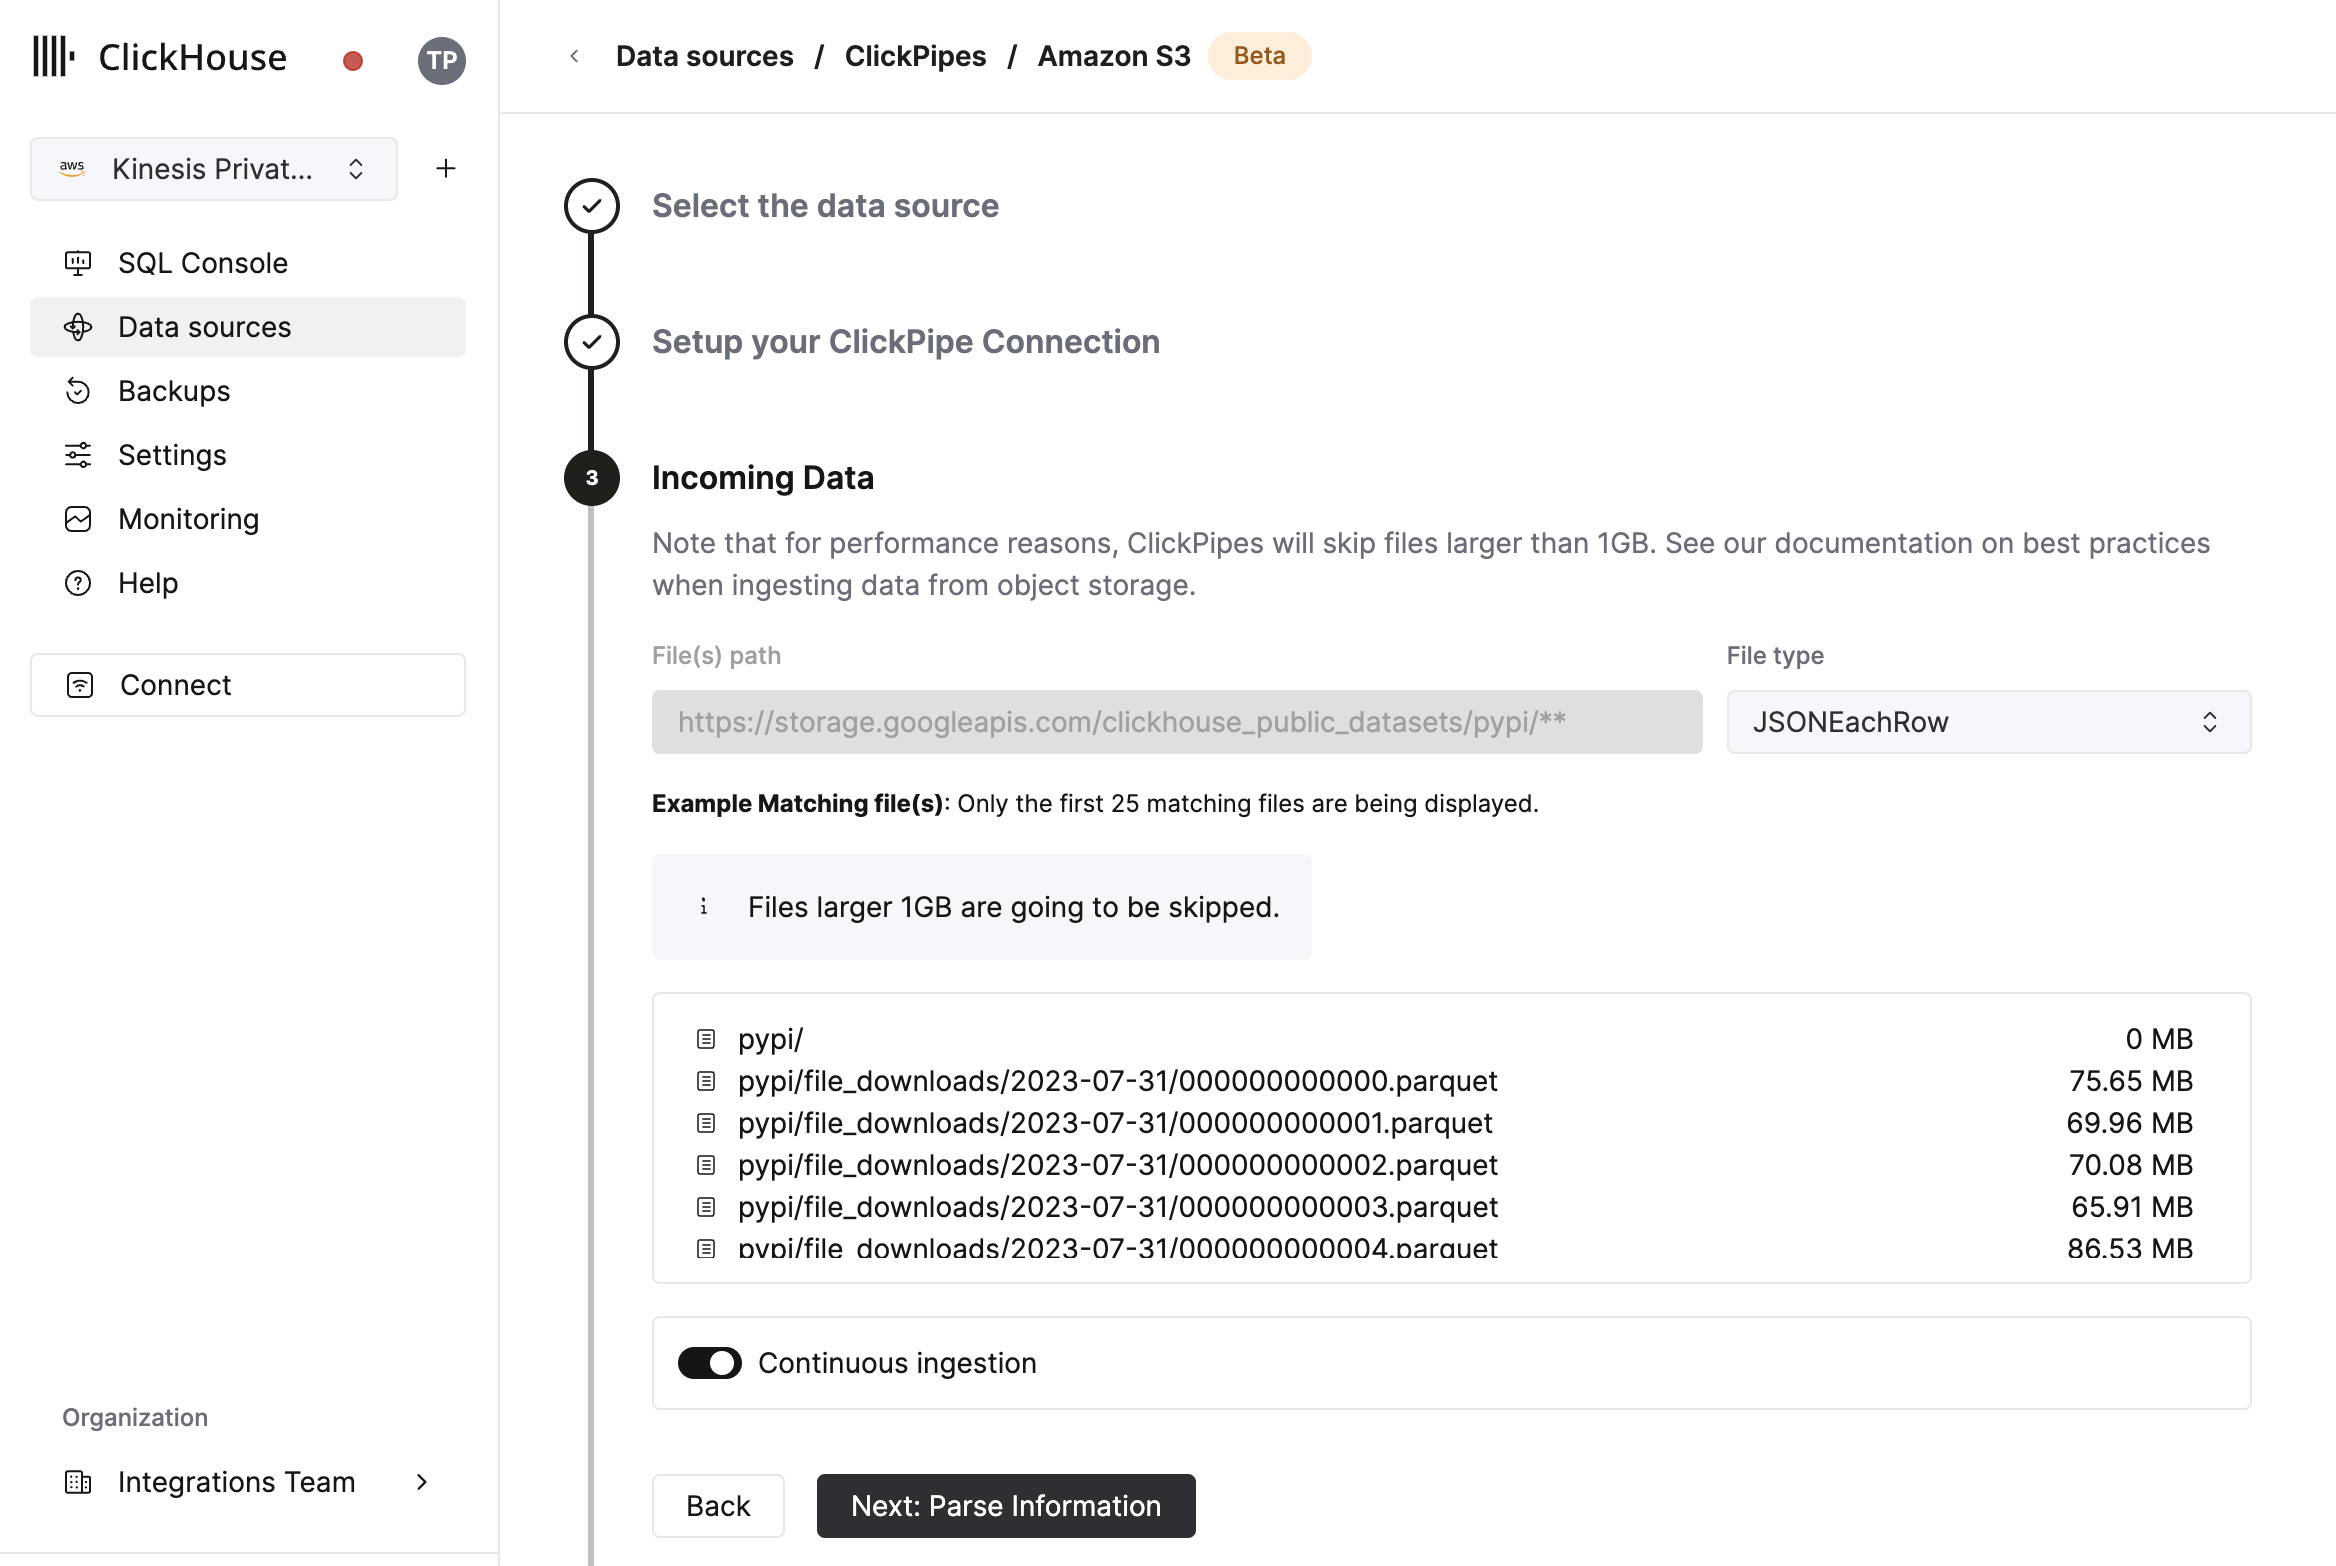
Select data format
The UI will display a list of files in the specified bucket. Select your data format (we currently support a subset of ClickHouse formats) and if you want to enable continuous ingestion. (More details below).
Configure table, schema and settings
In the next step, you can select whether you want to ingest data into a new ClickHouse table or reuse an existing one. Follow the instructions in the screen to modify your table name, schema, and settings. You can see a real-time preview of your changes in the sample table at the top.
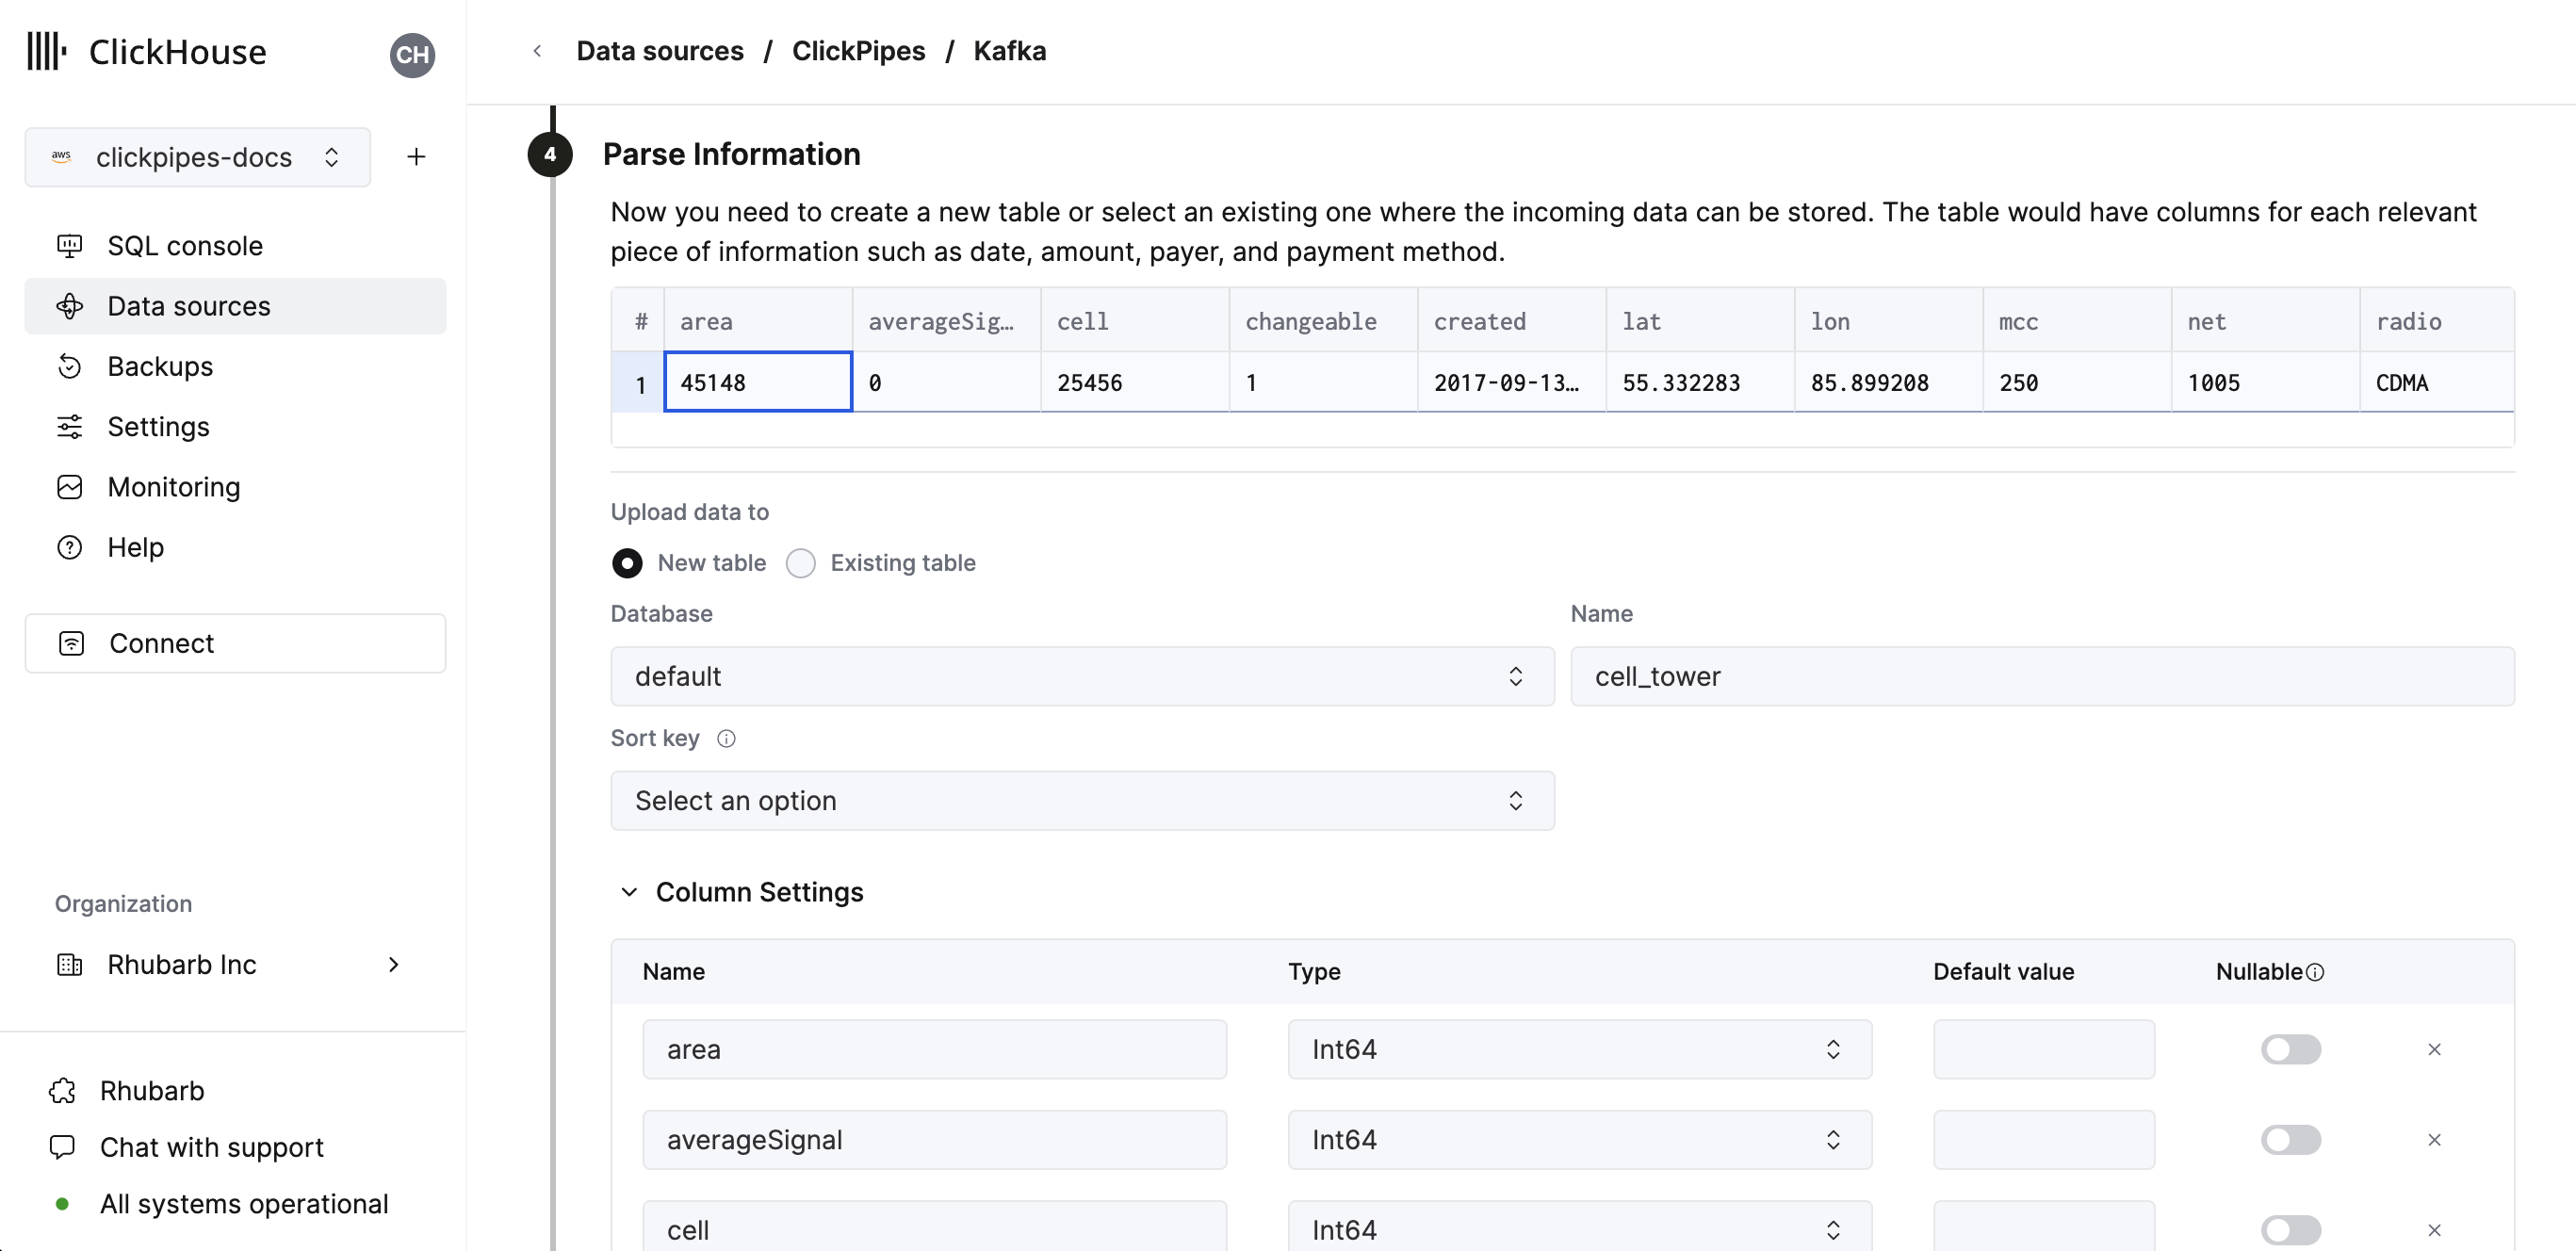
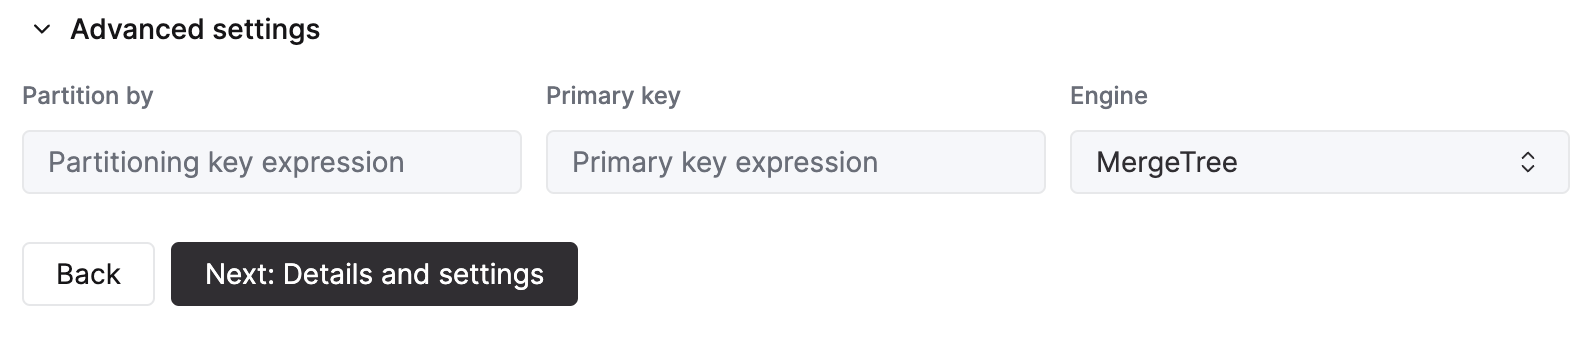
You can also customize the advanced settings using the controls provided
Alternatively, you can decide to ingest your data in an existing ClickHouse table. In that case, the UI will allow you to map fields from the source to the ClickHouse fields in the selected destination table.
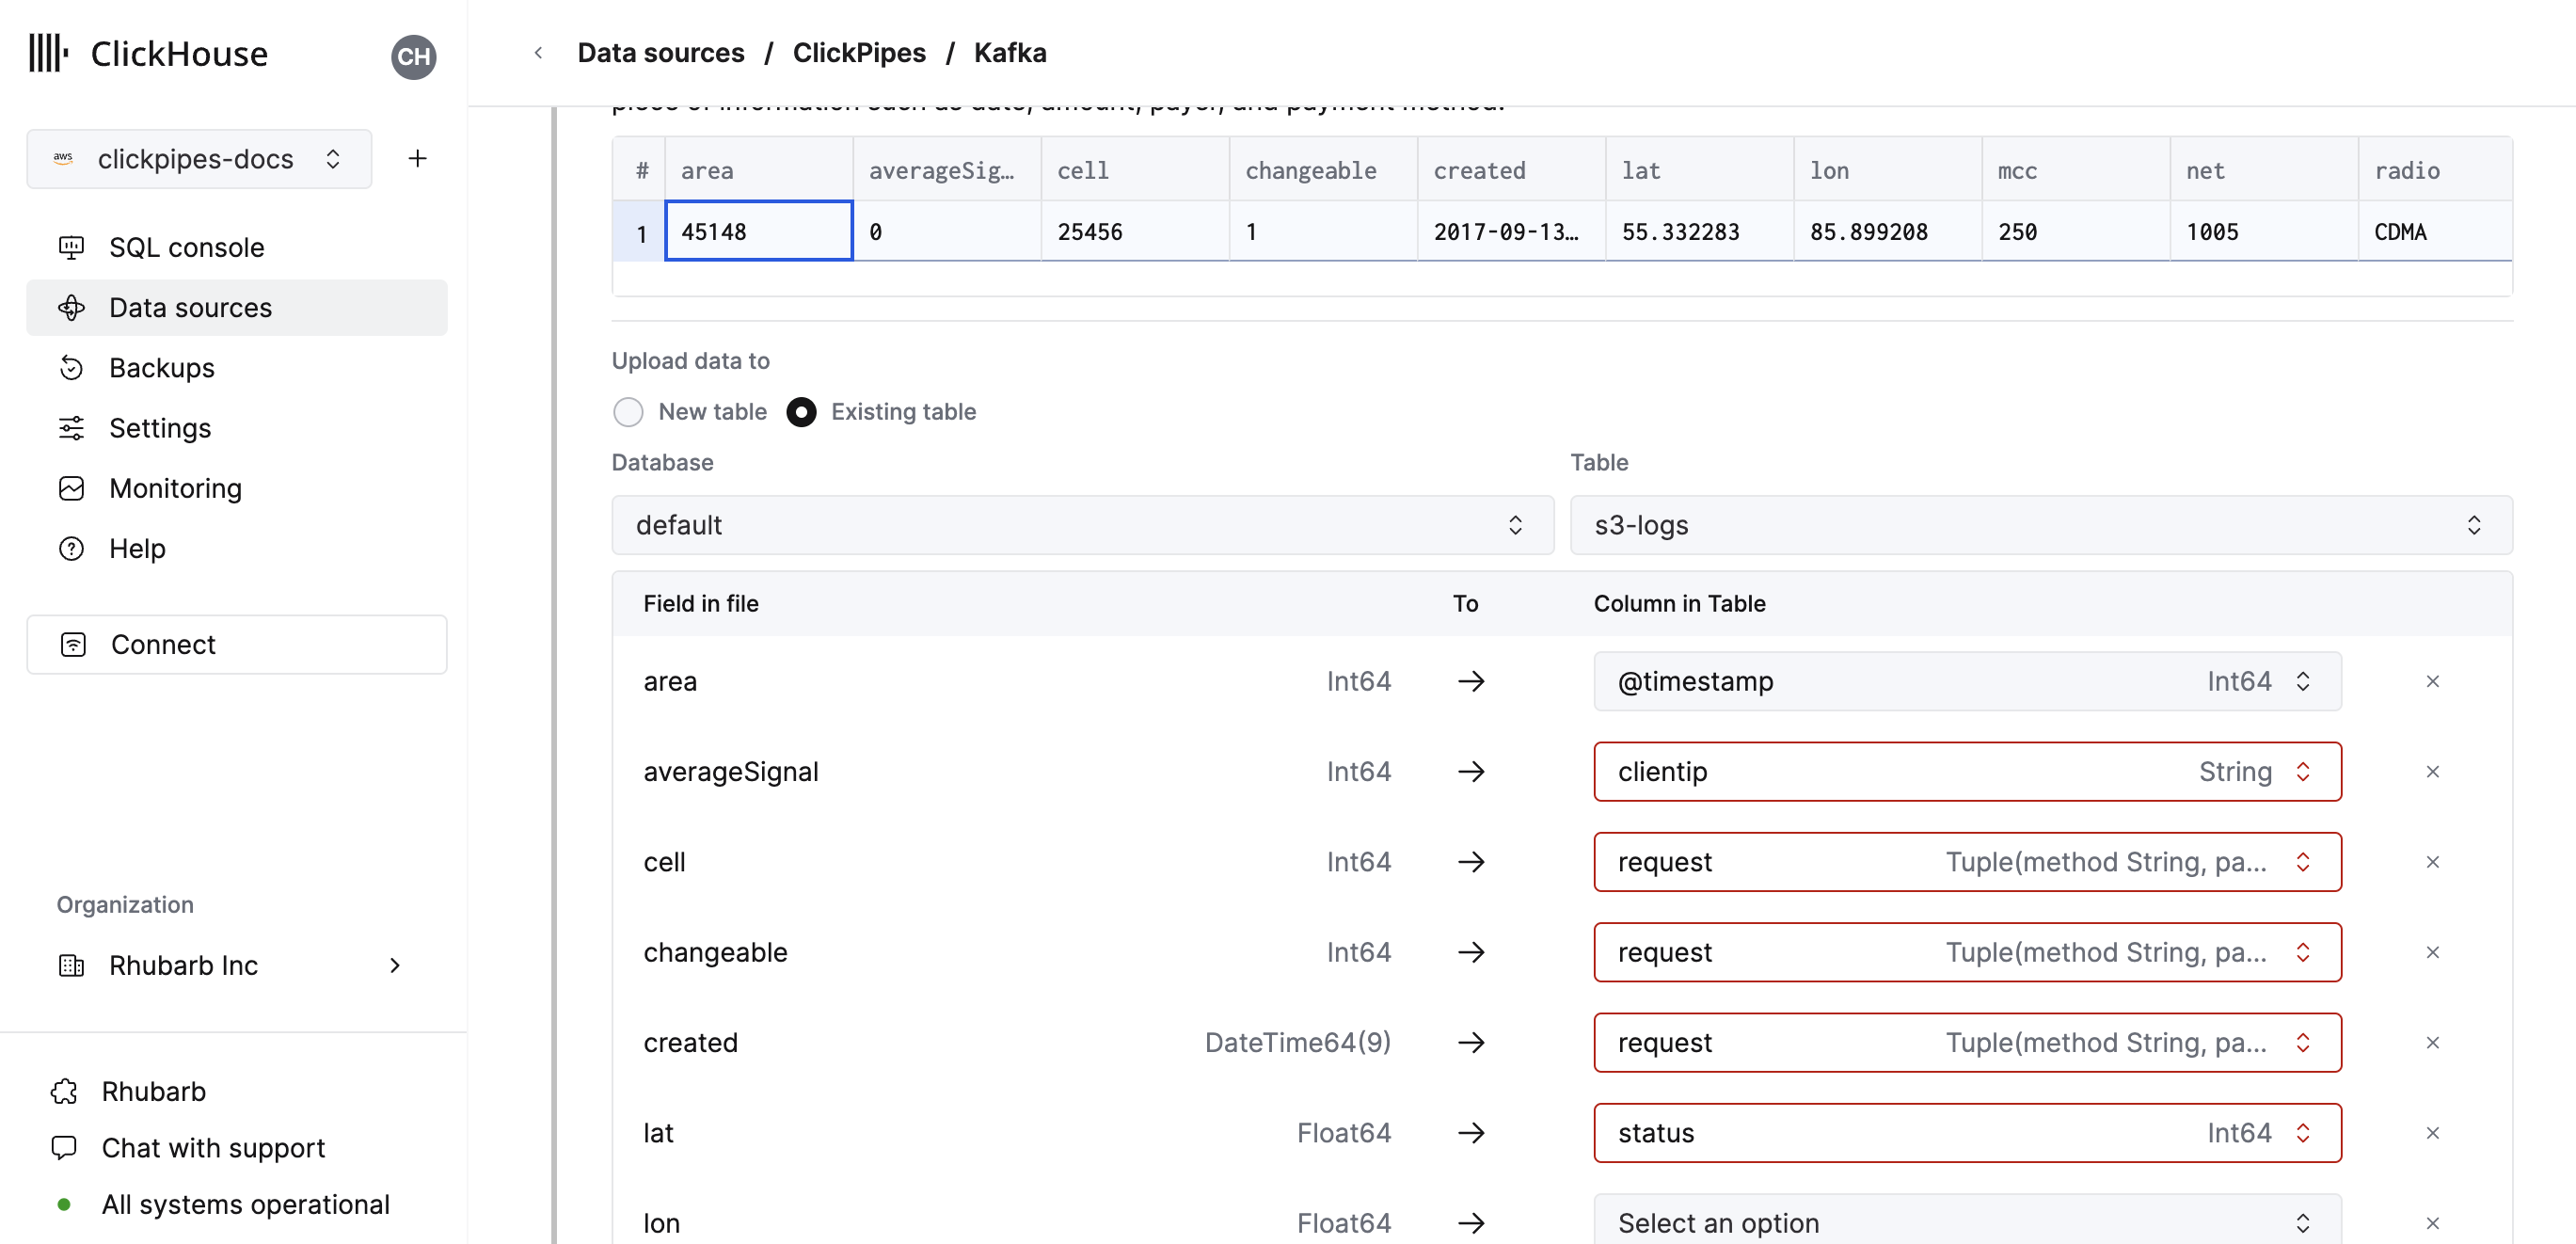
You can also map virtual columns, like _path or _size, to fields.
Configure permissions
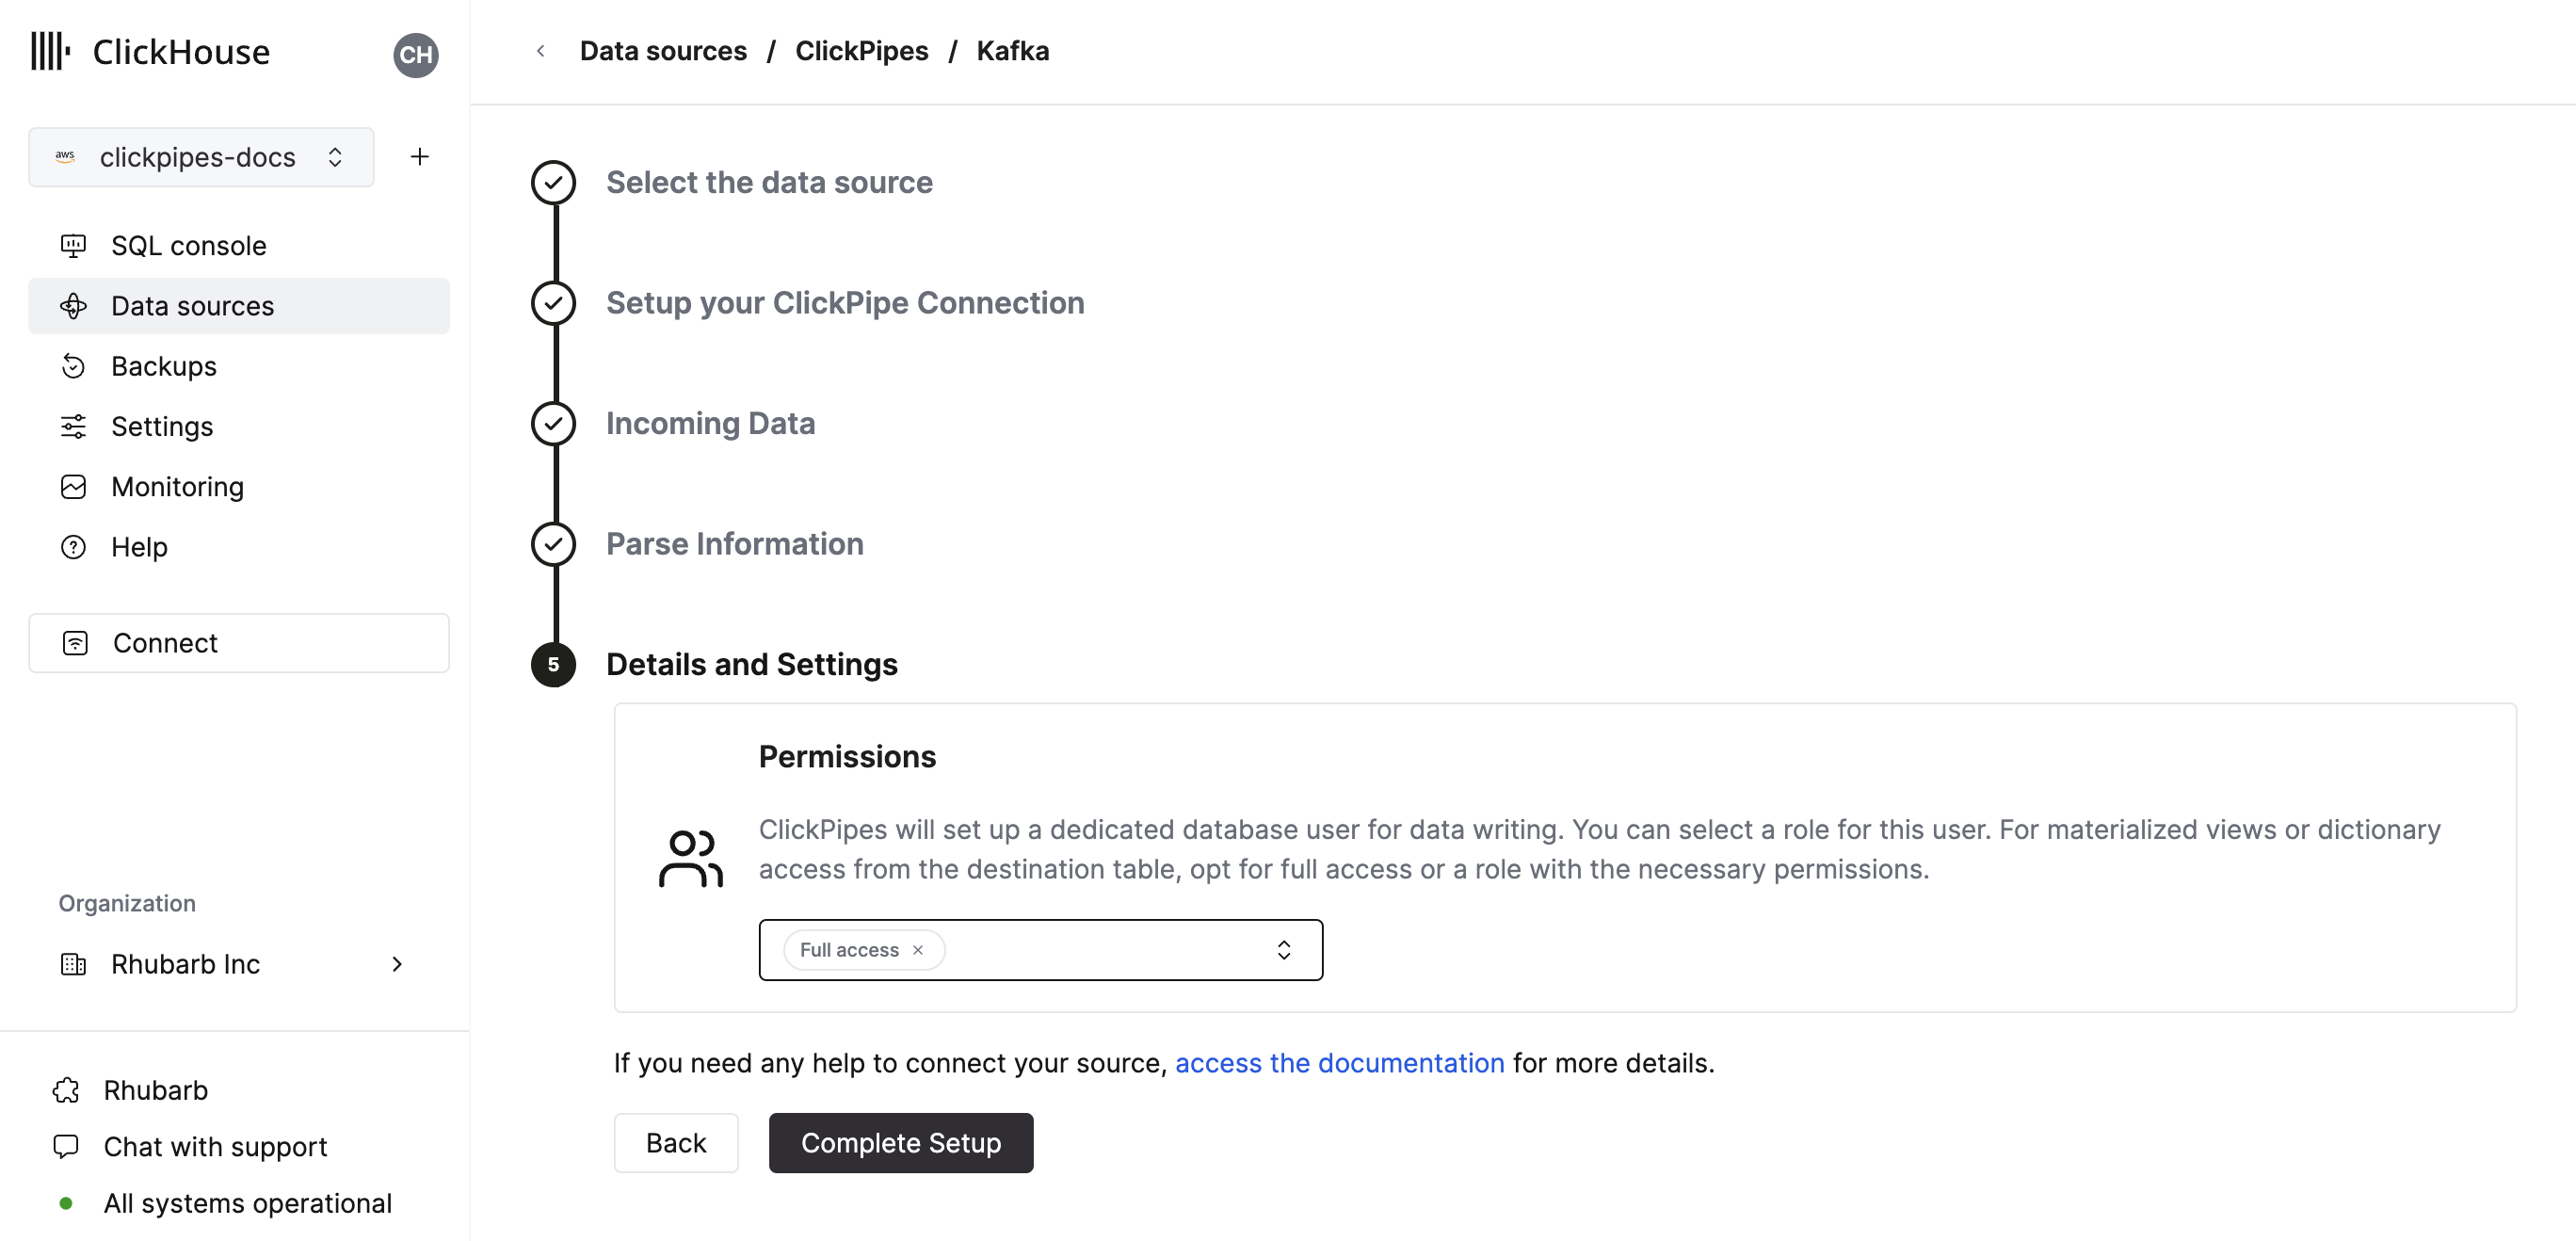
Finally, you can configure permissions for the internal ClickPipes user.
Permissions: ClickPipes will create a dedicated user for writing data into a destination table. You can select a role for this internal user using a custom role or one of the predefined role:
Full access: with the full access to the cluster. Required if you use materialized view or Dictionary with the destination table.Only destination table: with theINSERTpermissions to the destination table only.
Complete setup
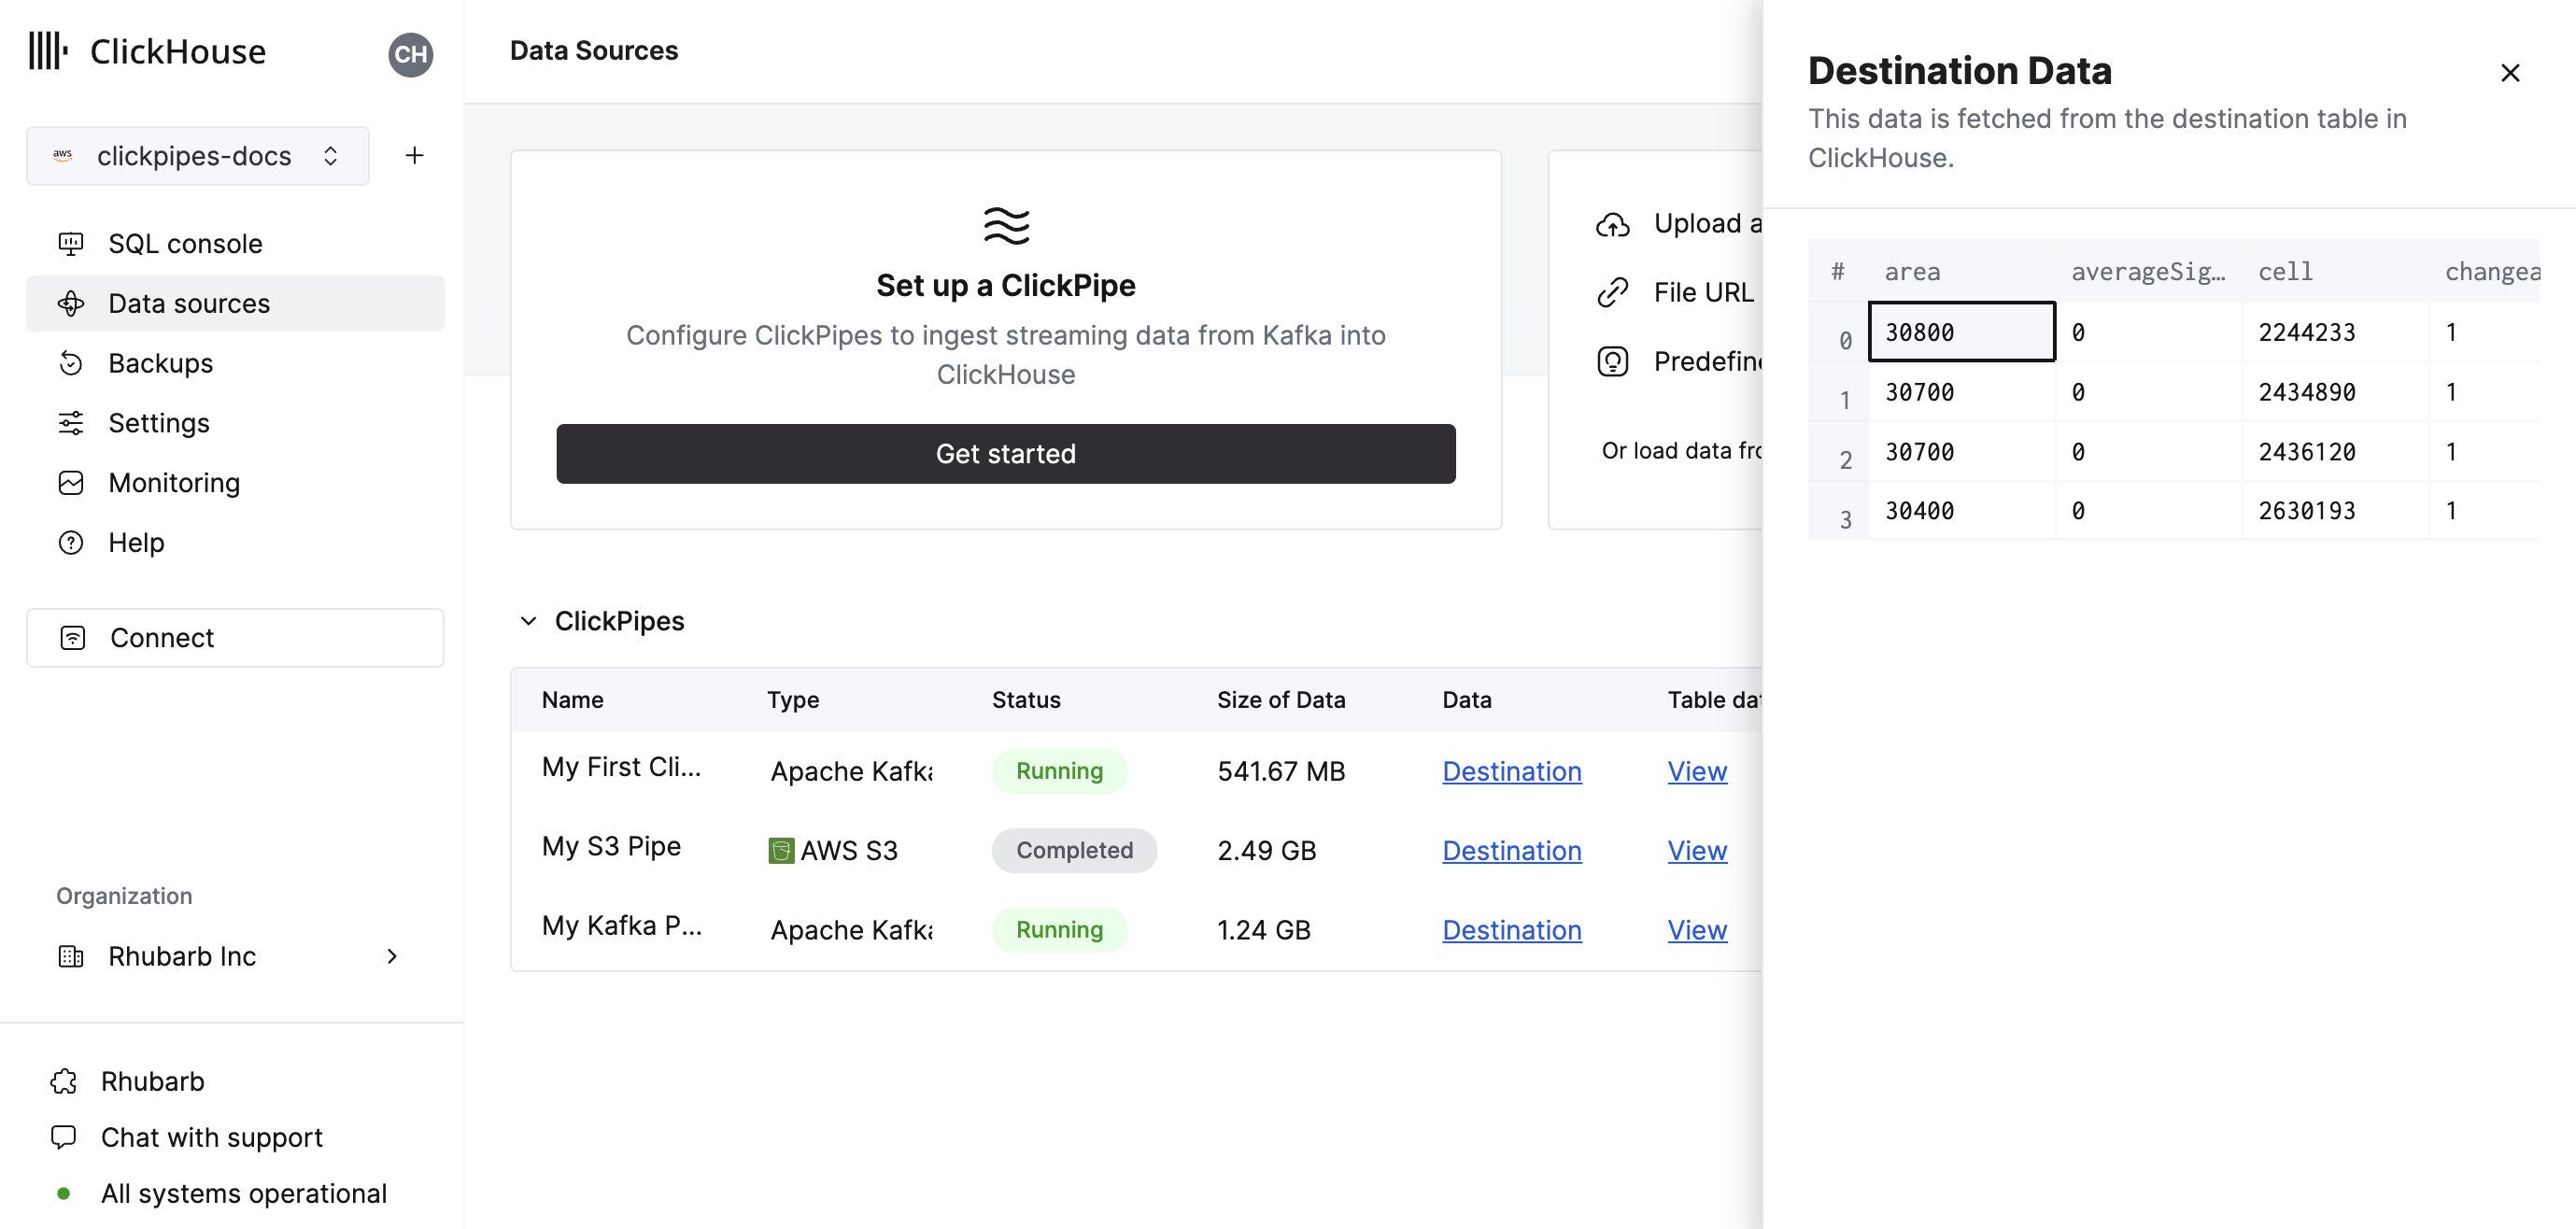
By clicking on "Complete Setup", the system will register your ClickPipe, and you'll be able to see it listed in the summary table.

The summary table provides controls to display sample data from the source or the destination table in ClickHouse
As well as controls to remove the ClickPipe and display a summary of the ingest job.

Congratulations! you have successfully set up your first ClickPipe. If this is a streaming ClickPipe, it will be continuously running, ingesting data in real-time from your remote data source. Otherwise, it will ingest the batch and complete.
